

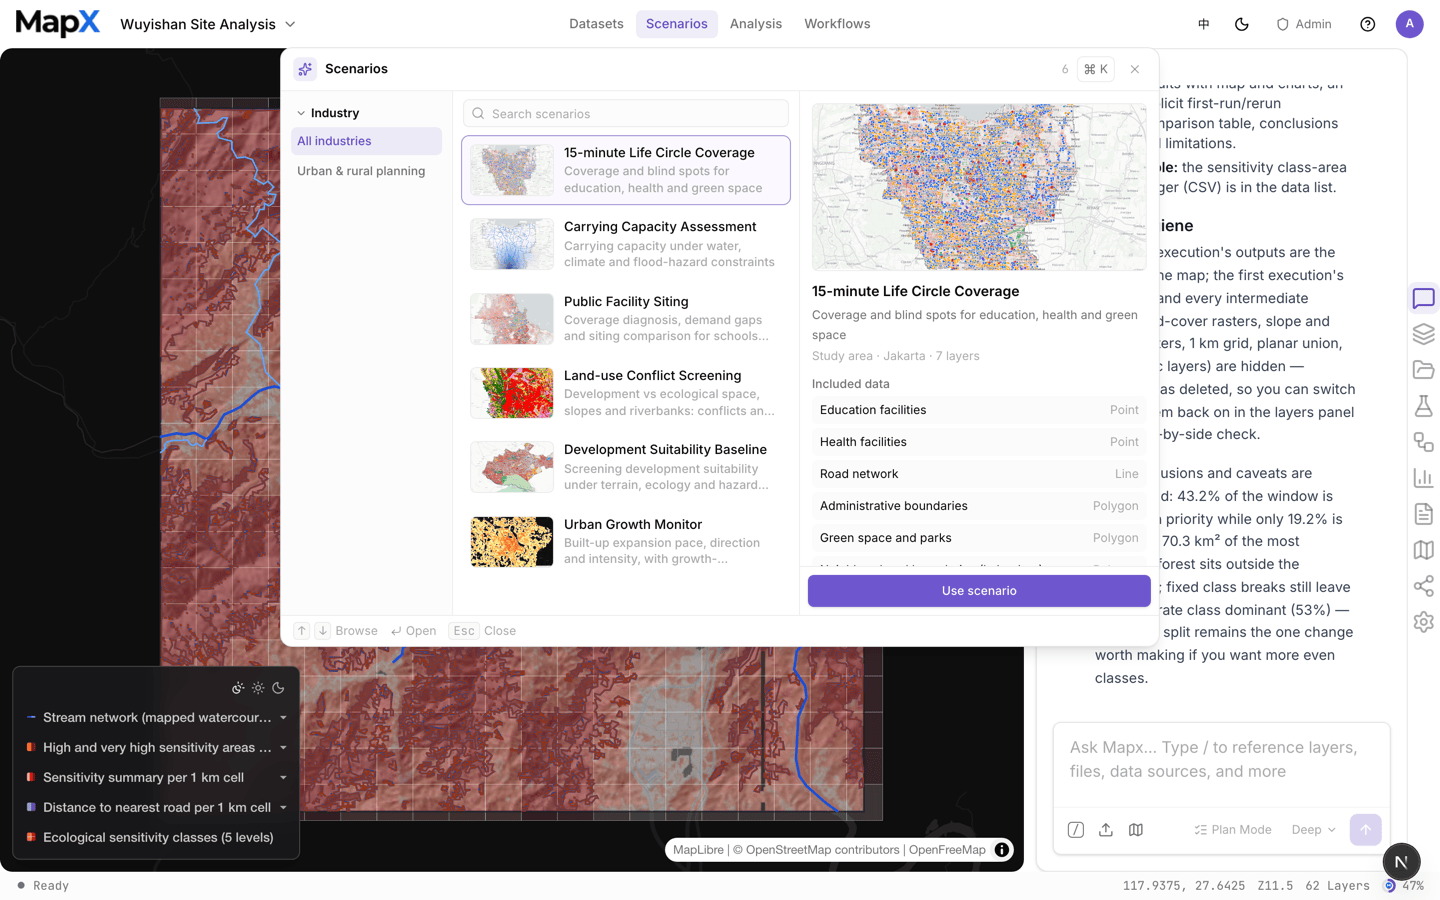
The six built-in scenarios
Every scenario is built from the built-in datasets catalog, so each layer arrives typed, styled, and with its source, licence, and attribution attached.
Each scenario has its own page describing the planning question, the data it ships, the method it follows, the platform tools it uses and what a run can produce — start from the scenario you need or browse all six below.
Where to find them
- Top menu → Scenarios — the catalog, filterable and searchable alongside datasets.
- New project screen — the scenario picker offers the same six scenarios when you start from scratch.
- Empty chat — the workspace chat offers scenarios before the first message.
Open a scenario
1
Pick a scenario
Open the catalog and select a card. The detail view lists the study area, the datasets included, the questions it is designed for, and the analysis tools behind it.
2
Open it in your project
Choose Open scenario. Every layer in the bundle is imported into the current project with its default style, legend, and attribution — no upload and no configuration.
3
Use a suggested question
The scenario ships with starter questions written for that study area. Click one to load it into the chat box, then send it, or edit it first. The AI recognises the scenario’s layers, so the question works without further setup.
If a project already contains the scenario’s layers, MapX asks before adding them again — the second import adds another layer set rather than replacing what you already styled.
Scenario, dataset, or workflow?
Scenarios are the fastest way to see the platform work end to end, and a good way to learn prompt patterns: each one documents the questions it was designed for, and the analysis chain behind them.
Related
- Built-in datasets — the catalog scenarios are assembled from
- Analysis — the tools a scenario’s method uses
- Workflows and plans — make your own repeatable version of a scenario
- Reports — turn a finished scenario run into a deliverable